
Table of Contents
Form filling
DocQ uses forms as a way to collect the required information to create a document based on the content collected within the forms.
Form attributes
Forms can have several pages. If this is the case, you can use the Next and Previous buttons at the bottom to navigate through them.

If the preview mode was enabled, you will see the Preview button at the bottom of the last page of the form, instead of the default Finish button.
Preview mode allows you to preview the document that will be created with the information provided through the form.
Field attributes
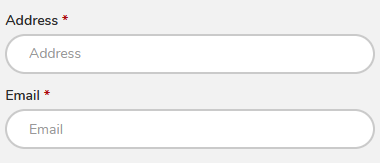
Required fields will be marked with a red-colored asterisk.
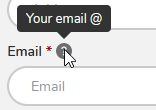
When applicable, a hint will be displayed as a tool-tip (?), near the field label, with additional information. This usually contains instructions to provide the desired information.
Certain fields (or even form pages) may only be displayed based on the value entered for other fields, as defined by the form editor.
Certain fields may allow you to customize the text entered into it, or to paste already-formatted text.
Attachment fields allow / require you to upload an attachment to complete the form. The supported filetypes are .pdf and .png.
E-signature fields
The form may require you to define and submit an e-signature (and your initials). When submitting such a form, the document created with it will be automatically e-signed with the provided signature.
To submit an e-signature, click on Select signature and follow the instructions below.

Note: Make sure you've added a signature type variable to the document.
Defining your e-signature
There are two ways to define your e-signature - by selecting the available e-signatures (and initials) based on your name, which are automatically generated by DocQ, or by drawing an e-signature yourself.
To use a signature generated by DocQ, select the Pre-defined tab, inform your full name and initials in the fields and click on the Generate signatures button. A variety of e-signatures and initials, generated based on different font types, will be displayed. Choose one, click on it and then click on Select signature.

If you prefer drawing your own e-signature, access the Draw tab and draw your signature in the field using your mouse cursor or, in case you are using a touch screen device, your finger or drawing pen. Click on Use and then on Select signature to submit this e-signature to the form.

Signing the document
If the preview mode is allowed for this form, you will be able to see the a preview of the signed document after submitting the form.
The form editor may also have enabled the ability for you to insert the e-signatures into the preview yourself. If this is the case, you will be required to define an e-signature only when getting to the preview.
After defining your e-signature, browse the preview to find the positions to insert it and click on them.
Finally, click on Finish to submit the form.
Saving and restoring form progress
The form editor may have enabled the ability to save the form progress, so you can finish and submit it at a later time. If so, you will see the  button at the bottom-left of the form.
To save your progress when filling a form, click on the Save/Load progress button. The Save/Load dialogue will be displayed.
Enter your email address to receive a unique form code for saving this progress, and hit the  button.

To overwrite a previous save that was done using the email address that you have informed, enter the form code that you have received in the Form code field. Leave this empty to receive a brand new form code.
Enter a name for the save in the Save name field. This will be inserted into the subject of the email with the form code, making it easier for you to find this save in the future, in case you have multiple saves sent to the same email address.
To restore your previously saved progress for this form, click on the Save/Load progress button and select the Load form tab.

Fill it with the email and form coded previsouly informed, and hit the  button.
Note: When submitting a form that was loaded using a form code, your save will be erased.
Page Tools
